📎 File Upload
The File Upload element in FormNX lets your users attach files directly to their form submission — perfect for resumes, contracts, receipts, supporting documents, and any workflow where users need to submit a file along with their answers.
You have full control over how many files users can upload, the maximum file size, which file types are allowed, and whether the uploaded files should be sent as email attachments.
📌 How to Add the File Upload Field to Your Form
Follow these simple steps:
- Open the Form Builder.
- On the left hand side, you'll see the Elements section.
- Find the File Upload element.
- Drag and drop the element onto your form OR click on the element to add it automatically.
Once added, the File Upload field will appear in your form layout, ready to be customized.
⚙️ How to Configure the File Upload Field
To customize the field:
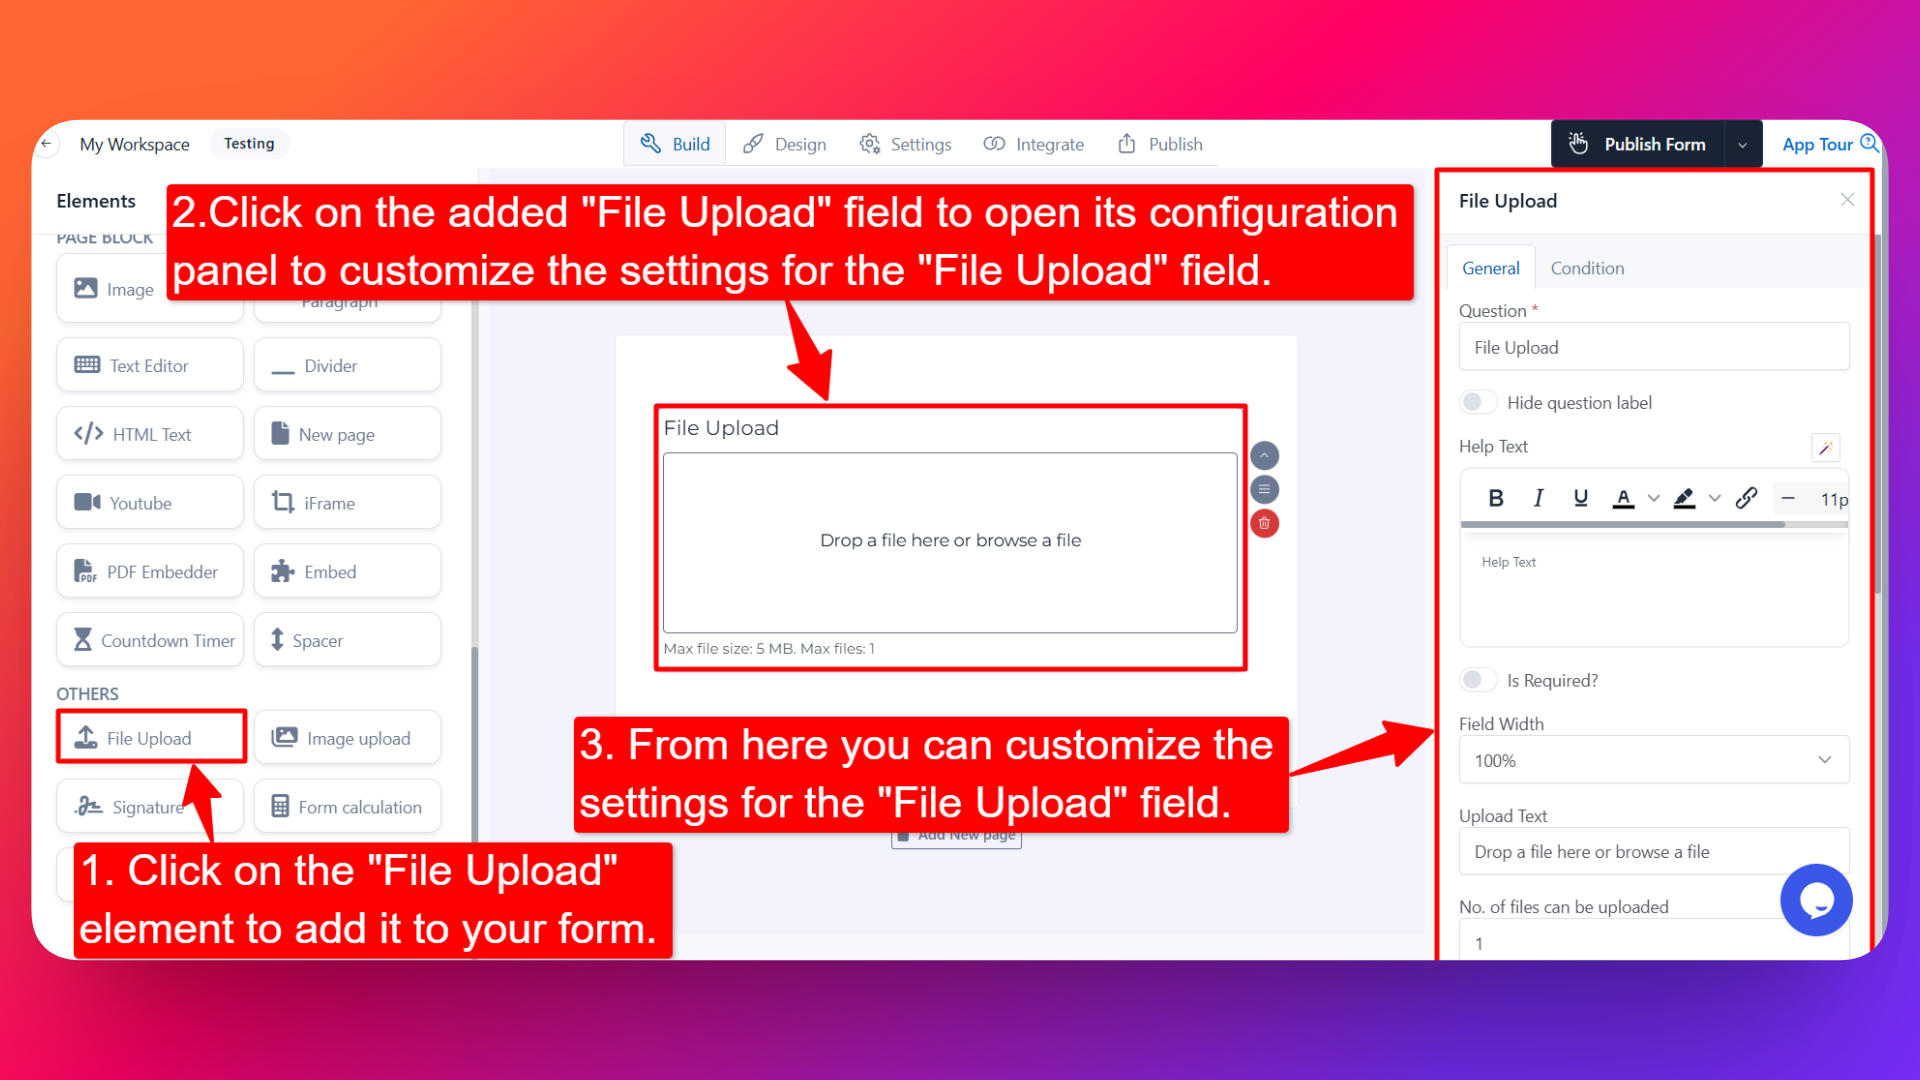
- Click on the File Upload element in your form.
- The configuration panel will open on the right hand side.
You can configure the following options:
- Question Label ✏️
- Add the question or label that users will see for this field.
- Example:
- "Upload your resume"
- "Attach supporting documents"
- Hide Question Label 🙈
- Enable this option to hide the question label while keeping the upload area visible.
- Help Text 📝
- Add a short instruction or hint below the field to guide users.
- Example: "Accepted formats: PDF, DOC, DOCX. Max size: 10 MB."
- Is Required ✅
- Enable the Is Required option to make the field mandatory.
- Users won't be able to submit the form unless they upload at least one file.
- Field Width 📐
- Adjust the width of the field to control how it appears on the form.
- Upload Text 📤
- Customize the text shown inside the upload area.
- Example: "Drop your file here", "Click to upload your resume", "Browse files".
- Number of Files Can Be Uploaded 🔢
- Set the maximum number of files a user can upload.
- Default: 1 file.
- Increase this value if you want users to attach multiple files in a single submission (e.g., portfolio, multiple receipts).
- File Size Limit 📏
- Set the maximum allowed file size (in MB).
- Helps prevent oversized uploads that can slow down submissions and consume storage.
- Example: 5 MB for resumes, 25 MB for design files.
- Allow File Types 📂
Choose which file types users can upload:
- All Types — When selected, users can upload files of any type. Useful when you don't want to restrict format.
- Specify Allowed Types — When selected, you can manually define exactly which file types are allowed.
- Enter file types as a comma-separated string of extensions.
- Example:
.jpg, .png, .jpeg, .pdf, .docx - Files outside the allowed types will be rejected at upload time.
- Send as E-mail Attachment 📧
- Enable this option to automatically attach uploaded files to the notification email sent when the form is submitted.
- Useful when you want files to land directly in your inbox without needing to log into FormNX to download them.
- Sensitive Data 🛡️
- Mark the field as Sensitive Data to handle the response with extra care (such as masking it in submissions).
- Field Name 🏷️
- Add a unique field name (used internally for integrations, exports, and conditional logic).
- Popover Help Text 💡
- Enable this option to show your help text inside an info icon next to the field.
- When users click on the info icon, the popover will appear with the help text you added.
- Keeps your form clean while still giving users access to extra guidance when they need it.
👤 How It Works for Users
When users open the form:
- They'll see the upload area with your custom upload text and any help text you've configured.
- They can click on the upload area (or drag and drop) to attach a file.
- If multiple file uploads are allowed, they can attach up to the number you've set.
- Files exceeding the size limit or outside the allowed types are rejected with an error.
- If "Send as E-mail Attachment" is enabled, files automatically flow into your notification emails.
- If the field is marked as required, they must upload at least one file before submitting.
💡 Common Use Cases
- Job application forms — Collect resumes, cover letters, and certifications.
- Contract and document submission — Accept signed PDFs and legal documents.
- Expense and reimbursement forms — Capture receipts, invoices, and bills.
- Design or creative briefs — Let clients upload reference files, brand assets, or sample work.
- Customer support tickets — Allow users to attach screenshots, error logs, or other context.
- Education and assignment forms — Accept student submissions, projects, or homework files.
- Vendor onboarding — Collect tax documents, compliance forms, and certifications.
The File Upload field gives your forms the flexibility to capture anything beyond plain text — making it a must-have for forms that drive real workflows.