📄 FormNX PDF Builder Guide
The PDF Builder in FormNX lets you create beautifully customized PDFs using your form data. Whether you want to generate reports, invoices, confirmation slips, or personalized documents, the PDF Builder helps you control how your exported PDF looks and what content it includes.
🧩 Adding Elements to Your PDF
To design your PDF layout, you can click on various elements on the left-hand panel of the PDF Builder. Here's what each element does:
- 📷 Image Element:
Use this to add your logo, a banner, or any image to your PDF.
- 📝 Heading & Paragraph Elements:
Use this to add a heading or subheading to organize your content clearly.
- ➖ Divider Element:
Insert horizontal lines to visually separate sections of your PDF.
- 🌐 HTML Text Element:
Use this to add custom messages, rich content, or use dynamic tags to personalize your PDF (e.g., including the user's name or email).
- 📄 New Page Element:
Add a page break. All content placed after this element will appear on a new page.
- ⬜ Spacer Element:
Use this to add vertical spacing between elements to improve layout and readability.
🧾 Inserting Form Data into the PDF
FormNX allows you to include your form submission data dynamically in the PDF:
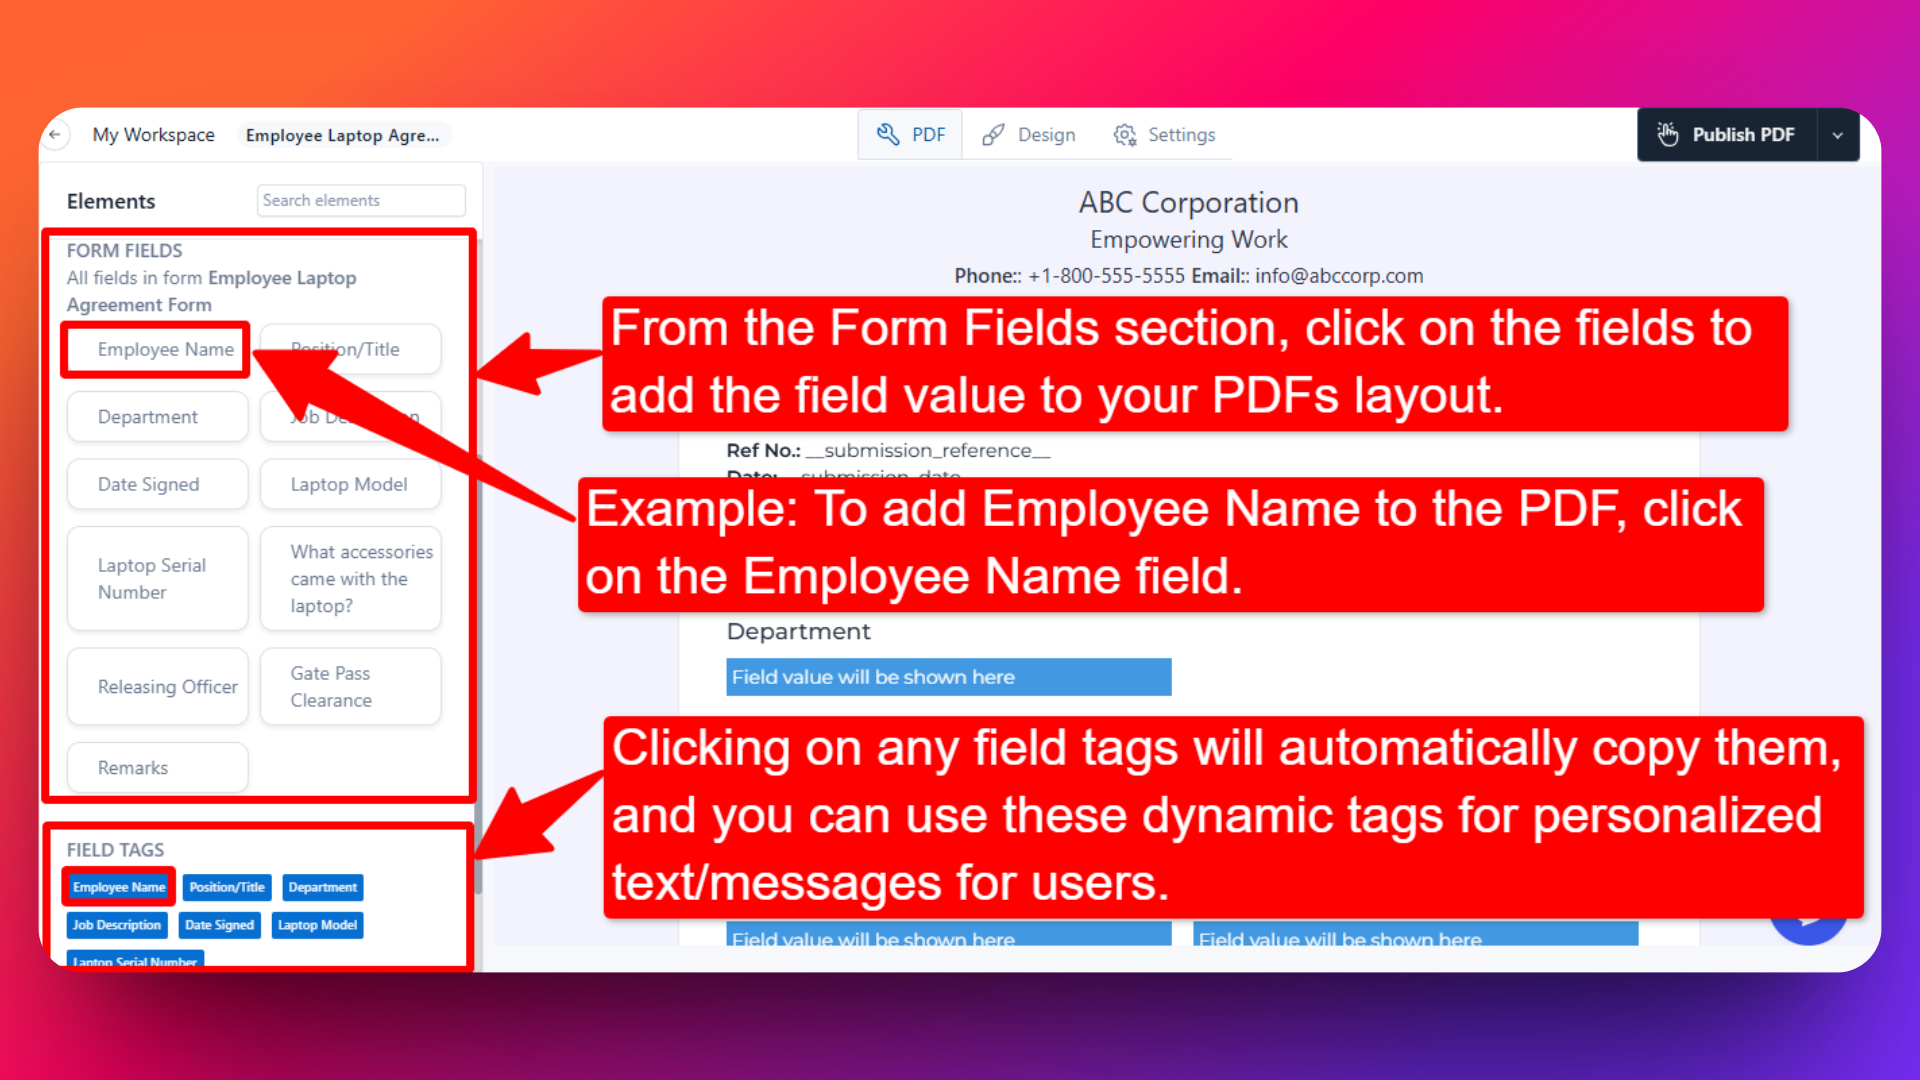
- 📋 Form Fields Section:
This section lists all the fields used in your form. You can use these to insert actual form responses into your PDF by just clicking on the fields.
- 🏷️ Field Tags Section:
Use these tags to dynamically display form responses in your PDF. When you click a field tag, it is copied automatically.
Example:
Using Dynamic Field Tags in a Certificate PDF:
If you're designing a certificate (e.g., for course completion, training, or participation), you can personalize it using dynamic tags.
Let’s say your form collects:
Student Name
Course Title
Completion Date
To create a personalized certificate, follow these steps:
Drag an HTML Text element into your PDF layout.
Write your certificate content, and paste the appropriate dynamic tags where needed.
Sample Certificate Text:
This is to certify that __student_name__ has successfully completed the course __course_title
on __submission_date__.
To get the tags like __student_name__, go to the Fields Tag section, find the respective field, and click to copy the tag.
When the PDF is generated, it will look something like:
➤ This is to certify that John Doe has successfully completed the course Web Development Basics on July 10, 2025.
You can repeat this process for any form field you want to dynamically insert into the PDF (like email, date, address, etc.).
🎨 Customizing the Look of Your PDF
To design a professional-looking PDF that matches your brand:
Go to the Design Tab in the PDF Builder.
Use these options to style your PDF:
🎨 Color Scheme
- Select a pre-defined color palette that suits your brand.
📄 Page Background
Choose a solid color
Add a gradient
Upload a background image
Or keep it transparent
🔤 Fonts Select from available fonts to control how your text appears.

⚙️ PDF Settings
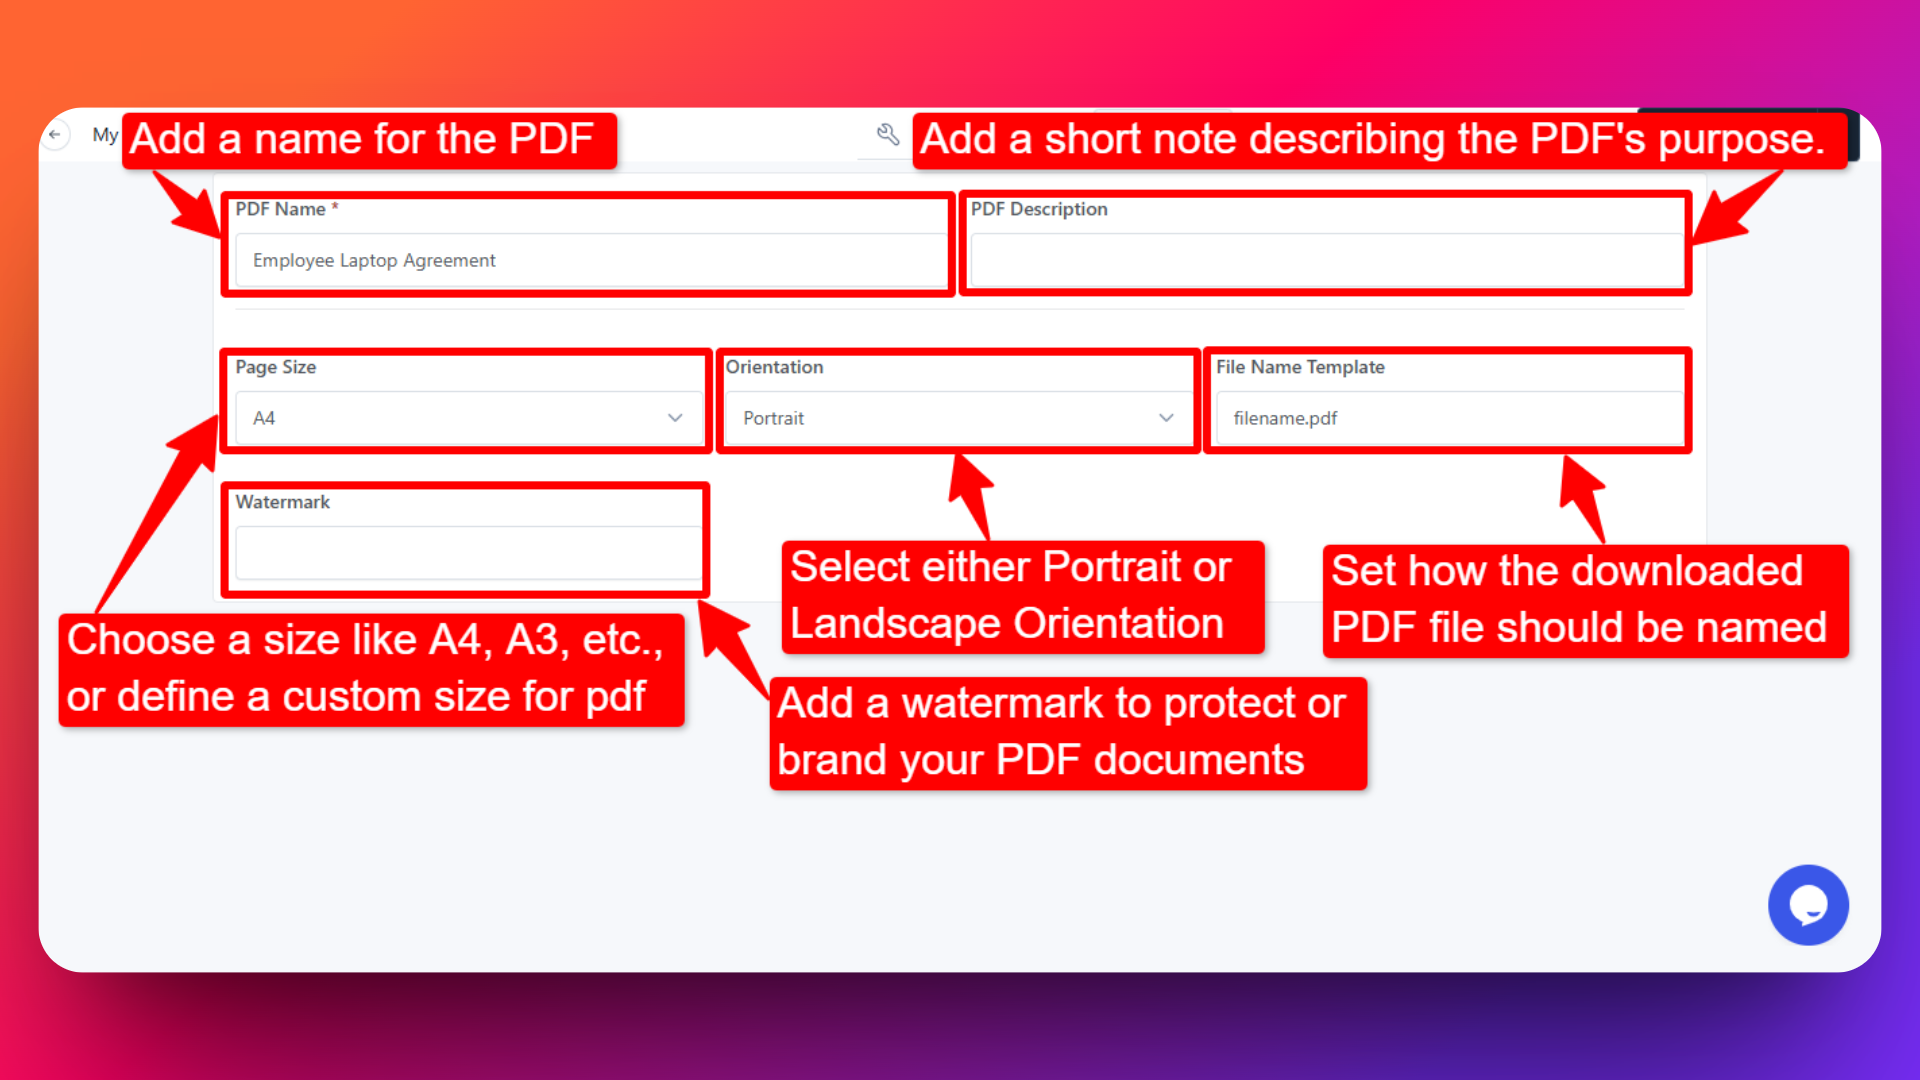
Under the Settings tab of the PDF builder, you can control the output properties of your PDF:
PDF Name - Give your PDF a title for internal reference.
PDF Description - Add a short note describing the PDF's purpose.
Page Size - Choose from standard sizes like A4, A3, etc., or define a custom size.
Orientation - Select either Portrait or Landscape layout.
Filename Template - Set how the downloaded PDF file should be named (e.g., confirmation.pdf).
Watermark - Add a watermark to protect or brand your PDF documents.
- Always preview your PDF before finalizing to ensure the layout and dynamic data appear correctly.
- Use the New Page element wisely to control page breaks and avoid content cut-offs.
- Keep your design clean and consistent to maintain professionalism.
Related feature: PDF builder